Interesting LaTeX Packages – Drawing the Solar System

Many times we need to quickly illustrate the solar system or the planets. Usually we use photos to illustrate the planets. But sometimes the photos can be an over kill. Also to draw the entire solar system is a typical and can be used for illustrative purposes. Though most of the illustrations of the solar system in the school and other text books are horribly out of scale, (with no indication that the figure is not to scale!). For example,  look at the illustration in the Class 6 Science Textbook from NCERT.

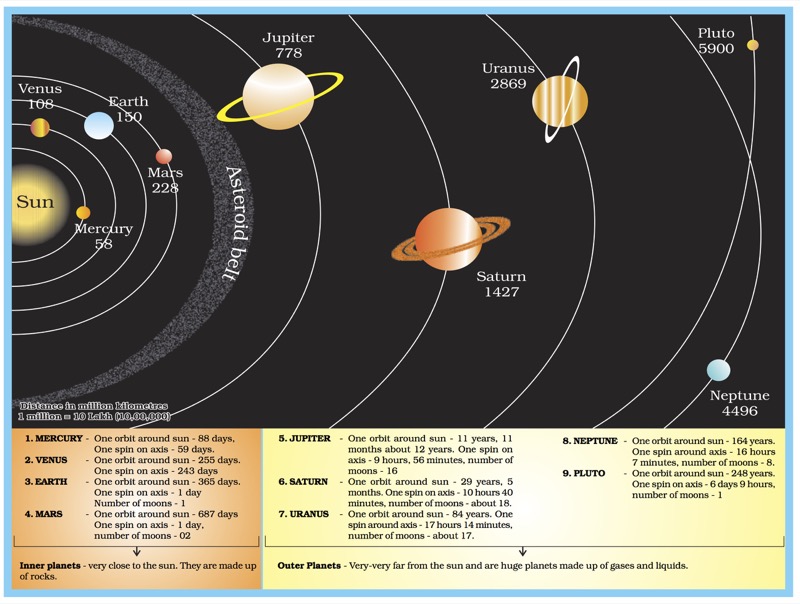
A good visualisation will always present a scale, and/or indicate whether the visualisation is to the scale or not. Though in the visualisation above the distances are given, they are not to scale.


Coming back to the topic of our post, a simple way to draw solar system diagram in latex is to use the PStricks package solarsystem. The package can create “Position of the visible planets, projected on the plane of the ecliptic” at a given time and date. This feature might be useful sometimes.

From the package manual:

As we can not represent all the planets in the real proportions, only Mercury, Venus, Earth and Mars are the proportions of the orbits and their relative sizes observed. Saturn and Jupiter are in the right direction, but obviously not at the right distance.
The orbits are shown in solid lines for the portion above the ecliptic and dashed for the portion located below.

The use of the command is very simple, just specify the date of observation with the following parameters, for example:
\SolarSystem[Day=31,Month=12,Year=2020,Hour=23,Minute=59,Second=59]
By default, if no parameter is specified, \SolarSystem gives the configuration day 0 hours to compile.

The resulting output for the above code:

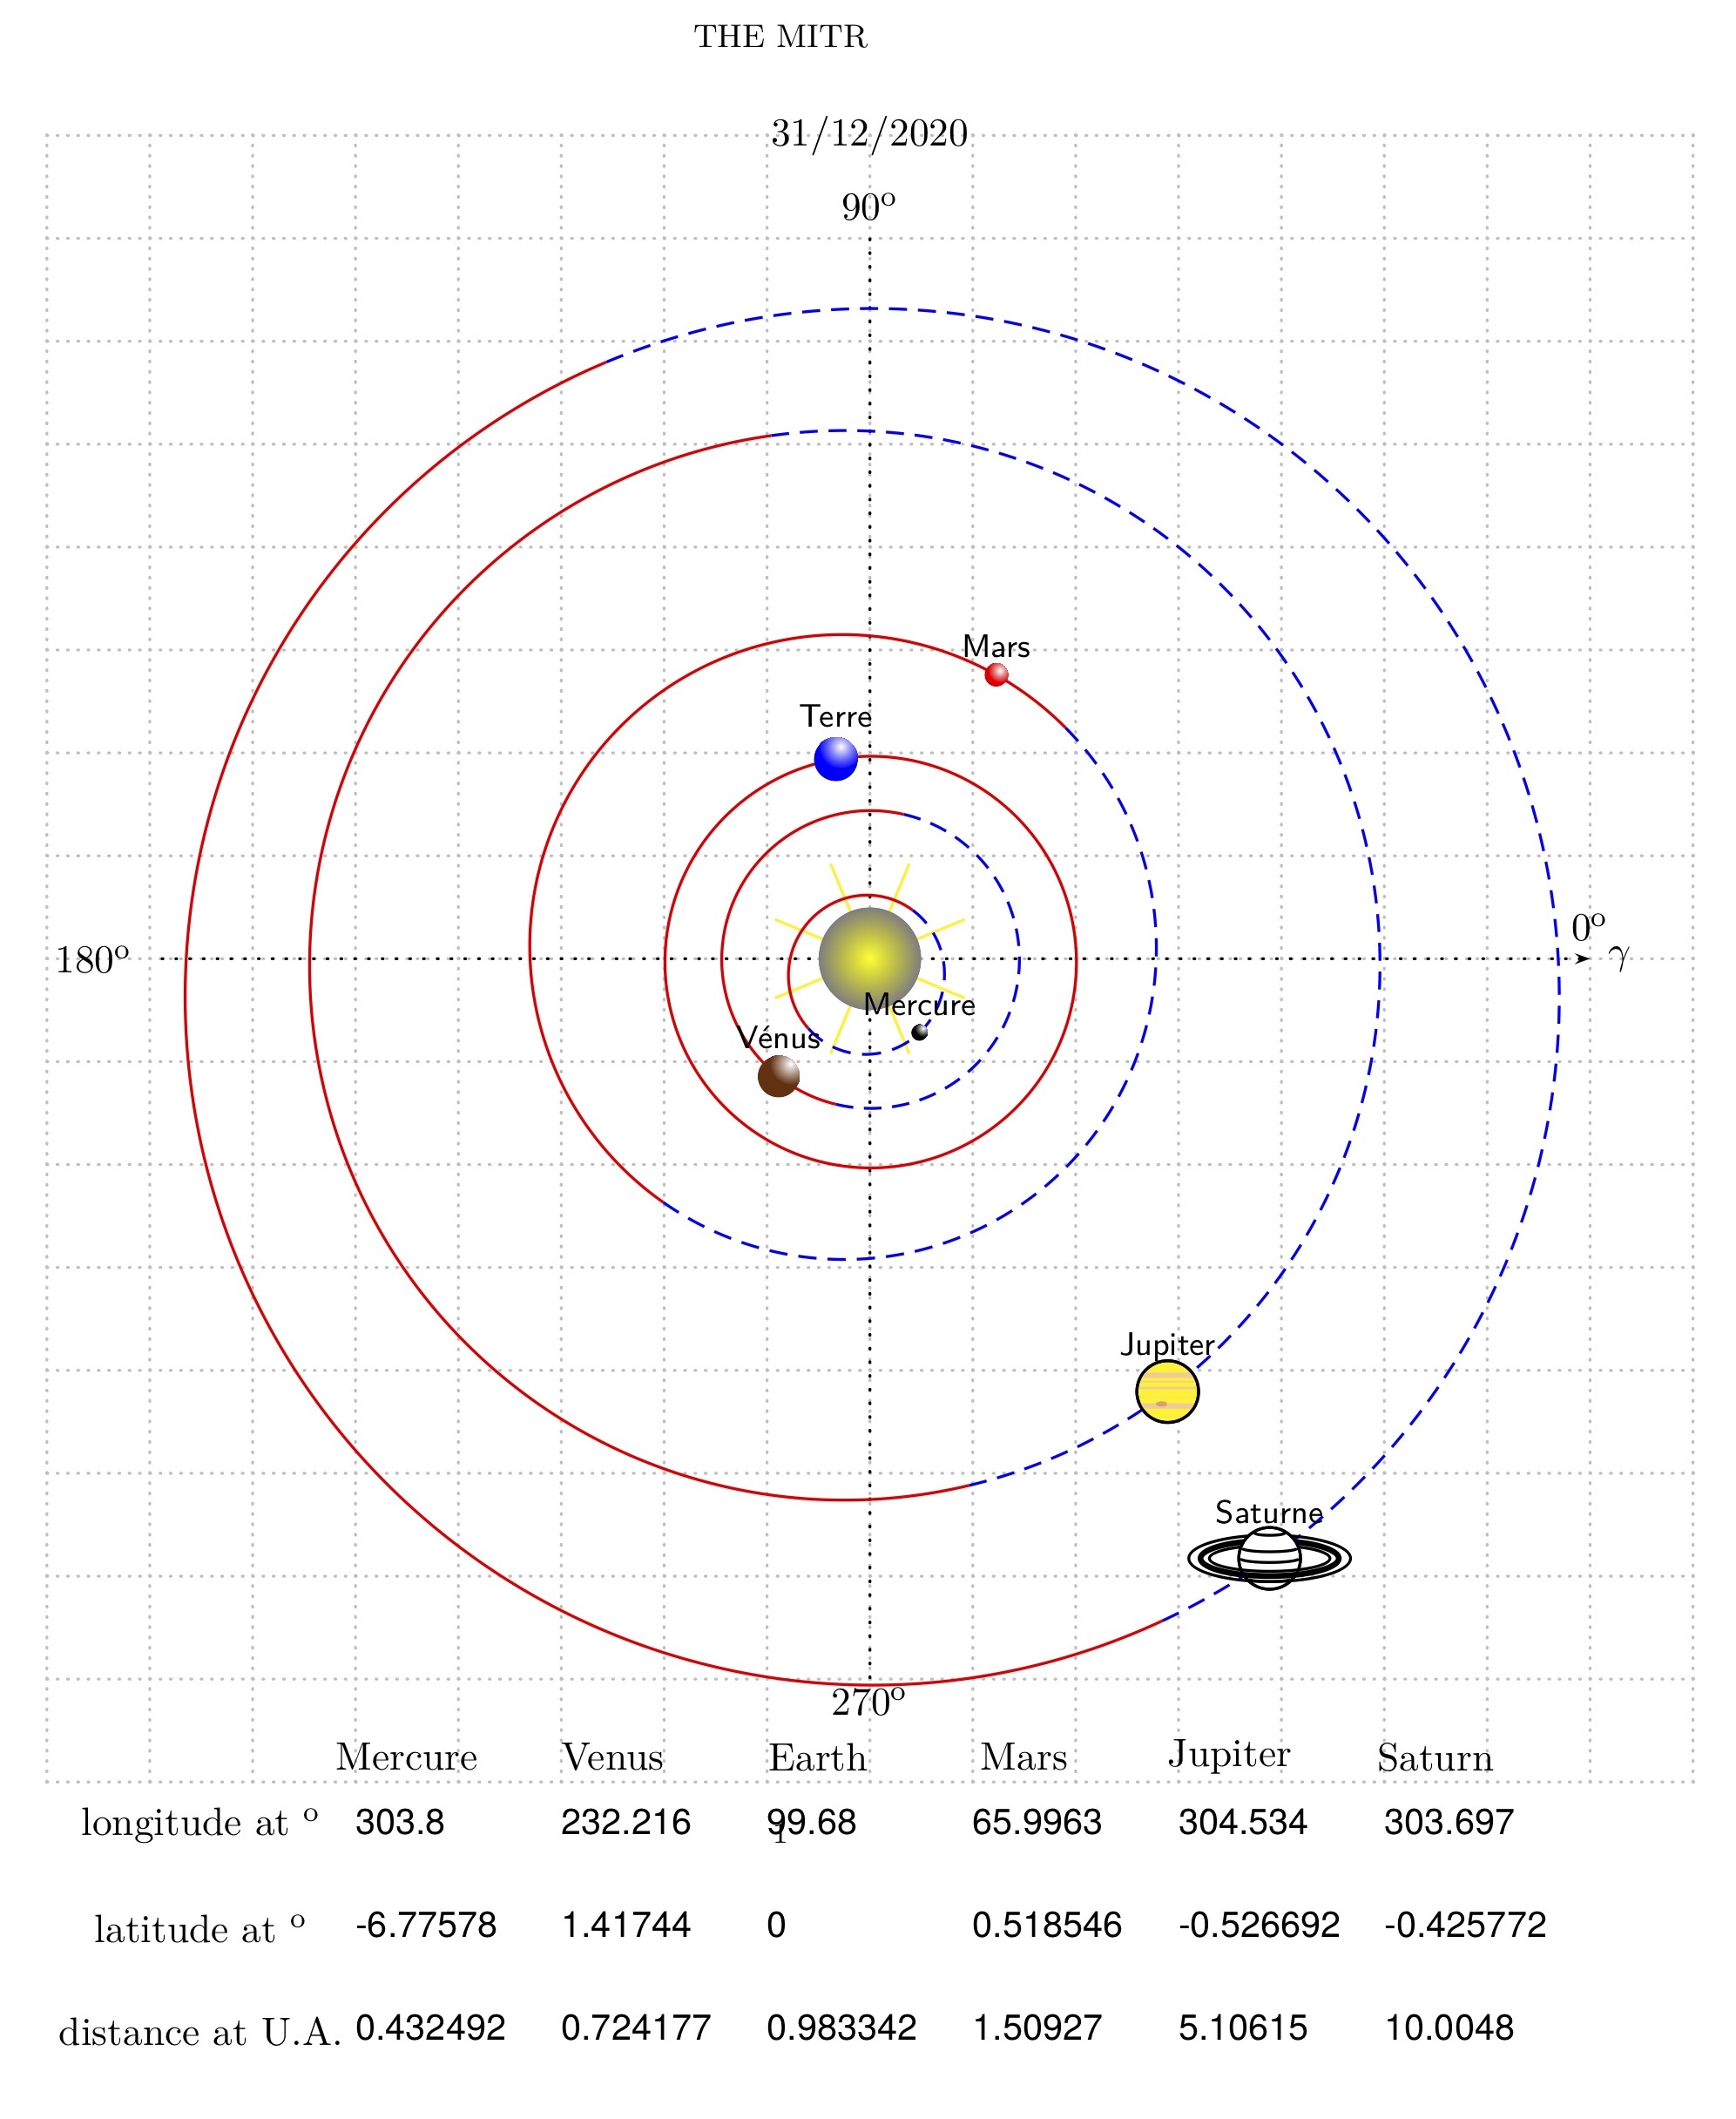
The output also provides the longitude and latitude of the planets at the time given.

Another package that is useful to create free standing planets is the tikz-planets package which we will see next.

Interesting LaTeX Packages – Bohr and Element – electronic orbits and atomic structure

One of the USPs of using LaTeX is the variety of packages that are available to get things done. Some packages will give you special environments to make your documents better, some will help in typesetting or some will help you create graphics or some just provide you with commands for specific symbols. Of course, all these can be done manually by creating your own command, but why reinvent the wheel? There are hundreds of packages at the Comprehensive TeX Archive Network. I have come across many packages that were useful via browsing the packages at CTAN. In this series of posts we will see some packages that are interesting and might be useful. This series of posts is also a sort of personal bookmarking scheme for me. It has happened in the past that I have discovered some interesting LaTeX package, only to forget its existence when I needed its functionality in a project.
In this first post, we will look at two related packages bohr and elements by Clemens Niederberger. The bohr package provides you with a simple functionality to draw the Bohr diagrams for different elements along with electronic configurations.
Load the bohr package by \usepackage{bohr} in the preamble
To use the package simple type the number of electrons and the element symbol. For example, Lithium \bohr{3}{Li} will simply give you

Similarly for other elements
Lithium \bohr{3}{Li}Oxygen \bohr{8}{O}Carbon \bohr{12}{C}Mercury \bohr{80}{Hg}

Now another very useful option in the vohr package is to print the shell-wise electronic configuration for a given element. For example Oxygen \bohr{8}{O} \elconf{O} will give you

This will be a very useful feature when you are writing chemistry or atomic physics texts. Of course you can change the way the shells look.
\setbohr{
shell-options-add = dashed, shell-options-add = red, shell-dist = .75em, nucleus-options-set = {draw=black,fill=orange,opacity=0.5}, electron-options-set = {color=green}, insert-missing}

Mercury\bohr{80}{Hg} \elconf{Hg}

The insert-missing option will give you either the correct number of electrons when the element symbol is given, or  will give you the element symbol when the number of electrons is given. There are more options to explore in the documentation.
Now let us look at the elements package.

This package provides means for retrieving properties of chemical elements like atomic number, element symbol, element name, electron distribution or isotope number.

The package provides atomic number, symbol, name, main isotope and electronic configuration for elements upto 118. For example, just using the atomic number 35 I can get \elementname{35} \elementsymbol{35} \elconf{35}

Having the data accessible in the form of number can be very useful especially if you want to generate tables. The table below from the package documentation was generated by iteratively looping atomic number and invoking commands

\theelement
\elementsymbol{\arabic{element}}
\elementname{\arabic{element}}
\mainelementisotope{\arabic{element}}
\elconf{\arabic{element}}